skip to main |
skip to sidebar
New Year - New Choicesby Deborah in NC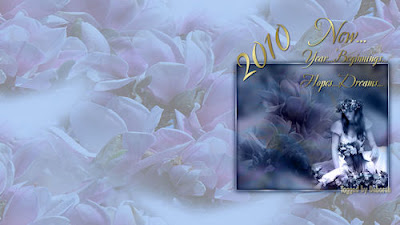 PDF Version of this tutorial can be found hereSupplies Needed:PSP (written in PSP X2, tested in 9 & X, will work in other versions with a few modifications)Font of choice, I used Avalon Medium a PTU font found hereSupplies zip file here includes:-007_verloop8a-ca-1024-flower (by LaManouche other work available here or here)-1163-luzcristina (by Luz Cristina other work available here)Material palette: Select a light color of choice, your favorite color and set as your FG color. For BG change to pattern and open a pattern of choice or use mine from the zip (Settings for mine were Angle 68, Scale: 100)1. Open 1024-flower. Duplicate image, close original.2. Delete the watermark layer3. Colorize to FG color 4. Duplicate Image (Shift + D). Minimize one copy5. Open 1163-luzcristina.6. Edit>Copy7. Close original8. Edit>Paste>Paste as a new layer9. Move to bottom right corner of image10. Layers>New Raster layer11. Layers>Arrange>Send to bottom12. Flood fill with FG13. Selections>Select All 14. Maximize 2nd copy of flower, Edit>Copy, minimize copy15. Edit>Paste>Paste into selection
.
Select None.16. Effects>Image Effects>Seamless tiling: default settings17. Adjust>Blur>Gaussian Blur: 1018. Layer palette, activate the flower tube layer. Layers>Properties: Blend Mode: Soft Light19. Layer palette, activate the woman and child layer. Layers>Properties: Blend Mode: Luminance (Legacy)20. Layers>Merge>Merge all (flatten)21. Selections>Select all22. Selections>Modify>Contract: 323. Selections>Invert24. Layers>New raster layer25. Flood fill with BG (pattern)26. Effects>3D Effects>Inner Bevel: #12, 5, 10, 3, 5, 0, white, 315, 30, 50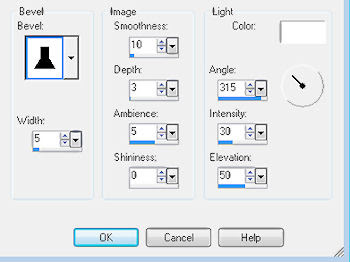 27. Selections>Select None28. Effects>3D Effects>Drop Shadow: 0, 0, 100, 15, black, Unchecked29. Repeat Drop Shadow30. Layers>Merge>Merge Visible31. New Image: Width: 1600, Height: 900, pixels, Raster Transparent (we are making large so that when we resize you will have a nice clear image)32. Flood fill with FG color33. Selections>Select All34. Maximize 2nd flower image. Edit>Copy. Close flower image.35. Edit>Paste>Paste into selection36. Selections>Select None37. Effects>Image Effects>Seamless tile: deafault38. Layers>Properties: lower opacity 50 to 70, your choice so that the image is pale in color39. Layers>Merge>Merge All40. Activate image created above. Edit>Copy. Minimize if you want to use as a header or tag, otherwise you can close the image41. Edit>Paste>Paste as a new layer42. Mover tool to position where you want the image to be. Mine is in the middle right. Be sure to leave space on the sides of about 20-30 pixels43. Layers>Properties>Blend mode: Luminance (Legacy)44. Effects>3D Effects>Drop Shadow: as before45. Text Tool: Font of choice (I used Avalon), Size: (2010 about double the size of the other text, New about 50% of 2010, rest of text I used 72), Bold: Selected, Centered: Selected, Vector: selected, Width: 0) and add text 2010, New..., Year...Beginnings...,Hopes...Dreams...46. Position Text as desired47. Layers>Convert to Raster layer48. Effects>3D Effects>Drop Shadow: 2, 2, 85, 5, black, Unchecked49. Layers>New raster layer50. Add watermark51. Layers>Merge>Merge All52. Resize to your monitor size (if necessary, Lock Aspect Ratio: Unchecked)53. jpeg and saveThat's it, you are done. You now have a desktop to ring in the New Year and Resolutions for the New Year.I hope you have enjoyed this tutorial, and thank you for trying it. If so, feel free to leave a comment, they are nice to see but not required.LEGAL INFO:
This tutorial was written and designed by Deborah and is made using teaching and tips gained from the web and PSP, Animation Shop, and the other programs used, the programs listed Help feature; and is my own creation. Any resemblance to other tutorials available is coincidental.
Please do not share this tutorial or to place it on any web site without my written permission. Please do not translate this tutorial into any other language without my written permission: kay2ndjackson@gmail.com. If sharing, please direct to my blog site at: http://deborahscornerincyberspace.blogspot.com/
Wake Up It's A New Year
by Deborah in NC
here is an example of what we will be making

PDF version of this tutorial can be found here
Supplies Needed:
PSP (written in PSP X, will work in other versions)
-!!!dkj_121309_scatter_mask
-BS_JCLeyendecker_New_Year's_Baby_LDM
-KMHappyNewYear2Shea
Supplies zipped can be found here
No outside plugins are used in this tutorial
1. New image: 500 x 500, pixels, Raster, Transparent (this is our working copy)
2. Flood fill with white
3. Open !!!dkj_121309_scatter_mask in PSP, Minimize
4. Open BS_JCLeyendecker_New_Year's_Baby_LDM in PSP
5. Edit>Copy
6. Minimize original
7. Working copy, Paste as a new layer.
8. Image>Resize: 50% (baby layer only)
9. Move to bottom right corner
10. Drop Shadow: -15, 10, 30, 5, Black, UNchecked
11. Open KMHappyNewYear2Shea in PSP
12. Edit>Copy
13. Close original
14. Working copy, Paste as a new layer.
15. Image>Resize: 50% (New Year Word Art layer)
16. Move to top left corner
17. Drop Shadow: 3, 3, 60, 5, Black, UNchecked
18. Layer palette, activate bottom layer (white layer)
19. Layers>New Raster layer
20. Material palette: FG: Select a color from the Happy New Year words layer, BG: Select a 2nd color from the Happy New Year words layer
21. Material palette: change BG to Foreground/Background gradient (Settings: Angle: 67, Repeats: 0, Linear)
22. Flood fill new raster layer with BG (gradient)
23. Layers>New Mask layer> From image (Settings: Select !!!dkj_121309_scatter_mask, Source Luminance, Invert mask data: UNchecked). OK
24. Layers>Merge>Merge All (flatten)
25. New image: 300 x 300, pixels, raster, transparent
26. Flood fill with BG (gradient)
27. Selections>Select All
28. Maximize BS_JCLeyendecker_New_Year's_Baby_LDM
29. Edit>Copy
30. Close original
31. Edit>Paste>Paste into selection
32. Selections>Select None
33. Effects>Image Effects>Seamless Tile: default settings
34. Adjust>Blur>Radial Blur: Settings: Twirl: checked, Strength: 70, Twirl Degrees: 0, Elliptical: checked, Horizontal, Vertical offset, & Protect Center: 0
35. Repeat Radial Blur
36. Back to working copy
37. Material palette: change FG to pattern, select pattern you just made (Settings: Angle: 68, Scale: 200)
38. Image>Add border: 1, color: white, Symmetric: checked
39. Image>Add border: 7, color: BG, Symmetric: checked
40. Image>Add border: 10, color: white, Symmetric: checked
41. Magic Wand (Settings: Add/Shift, RGB, Tolerance: 0, Use all layers/Sample layer: UNchecked, Contiguous: checked, Feather: 0, Antialias: check, Outside: selected) inside the new border
42. Flood fill with FG (pattern)
43. Effects>3D Effects>Inner Bevel (Settings: #1, 2, 0, 2, 0, 0, white, 225, 40, 50)
44. Selections>Select None
45. Image>Add border: 1, color: white, Symmetric: checked
46. Image>Add border: 7, color: FG, Symmetric: checked
47. Image>Add border: 30, color: white, Symmetric: checked
48. Magic Wand inside the new border
49. Flood fill with FG (pattern)
50. Effects>Artistic Effects>Topography (Settings: Width: 5, Density: 83, Angle: 45, Color: white
51. Selections>Float
52. Effects>3D Effects>Cutout (settings: 0, 0, 90, 25, FG, UNchecked)
53. Selections>Modify>Contract: 5
54. Effects>3D Effects>Cutout (settings: 0, 0, 90, 25, BG, UNchecked)
55. Selections>Modify>Contract: 5
56. Effects>3D Effects>Cutout (settings: 1, 1, 40, 6, Black, UNchecked)
57. Effects>3D Effects>Cutout (settings: -1, -1, 40, 6, Black, UNchecked)
58. Selections>Select None
59. Image>Add border: 1, color: white, Symmetric: checked
60. Image>Add border: 7, color: BG, Symmetric: checked
61. Image>Add border: 10, color: white, Symmetric: checked
62. Magic Wand inside the new border
63. Flood fill with FG (pattern)
64. Effects>3D Effects>Inner Bevel settings as before
65. Selections>Select None
66. Image>Add border: 7, color: FG, Symmetric: checked
67. Image>Add border: 1, color: white, Symmetric: checked
68. Selections>Select All
69. Selections>Modify>Contract: 82
70. Selections>Float
71. Effects>3D Effects>Cutout (settings: 1, 1, 70, 6, Black, UNchecked)
72. Effects>3D Effects>Cutout (settings: -1, -1, 70, 6, Black, UNchecked)
73. Selections>Invert
74. Effects>3D Effects>Inner Bevel (Settings: #1, 20, 0, 2, 0, 0, white, 225, 40, 50)
75. Selections>Select None
76. Layers>New raster layer
77. Add watermark
78. Add text as desired
79. Resize and save
You are done.
I hope you have enjoyed this tutorial, and I wish you a very Happy New Year. Thank you for trying the tutorial. If you enjoyed the tutorial, please feel free to leave a comment in the comments section below. Comments are nice to see but not required.
LEGAL INFO:
This tutorial was written and designed by Deborah and is made using teaching and tips gained from the web and PSP, Animation Shop, and the other programs used, the programs listed Help feature; and is my own creation. Any resemblance to other tutorials available is coincidental.
Please do not share this tutorial or to place it on any web site without my written permission. Please do not translate this tutorial into any other language without my written permission: kay2ndjackson@gmail.com. If sharing, please direct to my blog site at: http://deborahscornerincyberspace.blogspot.com/
Tubes by: LDM & KM, and were through group share
Mask by: Deborah in NC
A special thank you to the ladies who tested this tutorial: jeanne, Karen, Patt, and Pastor Karen
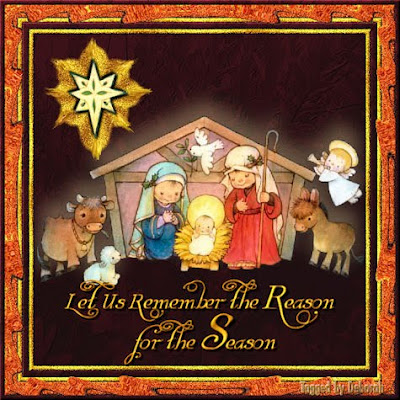
Seasons Reason
by Deborah in NC
 PDF Version can be found here:
Supplies Needed:
PSP (written in PSP X2, will work in other versions)
-DCIC Cranberry Season Papers here
-Paper 20
-Paper of choice
Tubes here
-dkj_09_Reason_Season_121209
-dkj_09_Reason_Season_Star_121209
1. Open Paper 20 from DCIC Cranberry Season Papers.
2. Duplicate (Shift + D).
3. Minimize original.
4. The Duplicate image is our working copy.
5. Open dkj_09_Reason_Season_121209
6. Edit>Copy
7. Close original
8. Paste as a new layer
9.Image>Resize layer: 60%, Bicubic
10. Adjust>Add/Remove Noise>Moire Pattern Removal: Fine Details: 1, Remove Bands: 4
11. Effects>3D Effects>Drop Shadow: Vertical: -20, Horizontal: 0, Opacity: 20, Blur: 35, Color: #fce6a7, Shadow on new layer: UNchecked
12. Repeat Drop Shadow
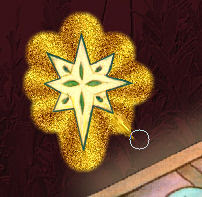
13. Open dkj_09_Reason_Season_Star_121209
14. Edit>Copy
15. Close original
16. Paste as a new layer
17. Move to top left corner
18. Colorize if desired
19. Selections>Select All
20. Selections>Float
21. Selections>Defloat
22. Selections>Modify>Expand: 20
23. Layers>New raster layer
24. Layers>Arrange>Move Down
25. Material palette: change FG to #f8ca29 and BG to a15e00
26. Material palette: change FG to gradient Settings: Foreground/Background, Angle: 0, Repeats: 19, Radial: selected, Vertical & Horizontal: 50
27. Flood fill tool: Flood fill selection with FG (gradient)
28. Adjust>Add/Remove Noise>Add Noise: Gaussian: checked, Noise: 50, Monochrome: checked
29. Selections>Select None
30. Adjust>Blur>Blur More
31. Smudge Brush tool (settings: Round, Size: 15, Hardness: 50, Step: 10, Density: 35, Thickness: 100, Rotation: 0, Opacity: 100, All layers/Sample layers: UNchecked
PDF Version can be found here:
Supplies Needed:
PSP (written in PSP X2, will work in other versions)
-DCIC Cranberry Season Papers here
-Paper 20
-Paper of choice
Tubes here
-dkj_09_Reason_Season_121209
-dkj_09_Reason_Season_Star_121209
1. Open Paper 20 from DCIC Cranberry Season Papers.
2. Duplicate (Shift + D).
3. Minimize original.
4. The Duplicate image is our working copy.
5. Open dkj_09_Reason_Season_121209
6. Edit>Copy
7. Close original
8. Paste as a new layer
9.Image>Resize layer: 60%, Bicubic
10. Adjust>Add/Remove Noise>Moire Pattern Removal: Fine Details: 1, Remove Bands: 4
11. Effects>3D Effects>Drop Shadow: Vertical: -20, Horizontal: 0, Opacity: 20, Blur: 35, Color: #fce6a7, Shadow on new layer: UNchecked
12. Repeat Drop Shadow
13. Open dkj_09_Reason_Season_Star_121209
14. Edit>Copy
15. Close original
16. Paste as a new layer
17. Move to top left corner
18. Colorize if desired
19. Selections>Select All
20. Selections>Float
21. Selections>Defloat
22. Selections>Modify>Expand: 20
23. Layers>New raster layer
24. Layers>Arrange>Move Down
25. Material palette: change FG to #f8ca29 and BG to a15e00
26. Material palette: change FG to gradient Settings: Foreground/Background, Angle: 0, Repeats: 19, Radial: selected, Vertical & Horizontal: 50
27. Flood fill tool: Flood fill selection with FG (gradient)
28. Adjust>Add/Remove Noise>Add Noise: Gaussian: checked, Noise: 50, Monochrome: checked
29. Selections>Select None
30. Adjust>Blur>Blur More
31. Smudge Brush tool (settings: Round, Size: 15, Hardness: 50, Step: 10, Density: 35, Thickness: 100, Rotation: 0, Opacity: 100, All layers/Sample layers: UNchecked
 32. Place the smudge brush tool on the rounded edge as indicated here:
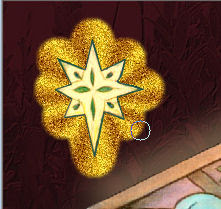 33. Click, hold and "flick" slightly to drag out from the edge, you should have something like this:
 34. Repeat the smudge in the same place if needed to make it look like my example above
35. Move to the next rounded edge, and repeat the smudge as above.
36. Repeat smudge for remaining rounded edges
37. Activate the Star layer (top layer)
38. Effects>3D Effects>Drop Shadow: V&H: 3, Opacity: 100, Blur: 4, Color: black, Shadow new layer: Unchecked
39. Repeat Drop Shadow with this change only: V&H: -3
40. Layers>Merge>Merge All
41. Image>Add borders: 1, symmetric checked, Color: black
------------------------------
42.*1 - Image>Add borders: 7, symmetric, white
Magic Wand (settings: Add/Shift, RGB Value, Tolerance: 0, All layers: UNchecked, Contiguous: checked, Feather: 0, Anti-alias: checked, Outside: selected) inside new border
Flood fill with FG (gradient)
Effects>3D Effects>Inner Bevel: #1, 2, 0, 2, 0, 0, white, 315, 86, 20
Adjust>Add/Remove Noise>Add noise: as before
Select None
------------------------------
43. Image>Add border: 10, symmetric, white
44. Magic wand inside new border
45. Maximize DCIC Cranberry Season Paper 20
46. Edit>Copy
47. Reminimize
48. Image>Paste into selection
49. Effects>3D Effects>Inner Bevel: as before
50. Repeat *1 above
51. Image>Add border: 20, symmetric, white
52. Magic Wand inside new border
53. Select and open a 2nd paper of choice from DCIC Cranberry Season Papers
54. Edit>Copy
55. Close image
56. Image>Paste into selection
57. Effects>3D Effects>Inner bevel: as before only change color to FG
58. Adjust>Add/Remove Noise>Add Noise: as before
59. Effects>Distortion Effects>Ripple (Settings: Center offset - Horizontal: 50.00, Vertical: 50 / Settings - Amplitude: 10, Wavelength: 40 / Edge Mode: Transparent: checked
60. Selections>Select None
61. Image>Add border: 7, symmetric, white
62. Magic wand inside new border
63. Maximize DCIC Cranberry Season Paper 20
64. Edit>Copy
65. Close
66. Image>Paste into selection
67. Effects>3D Effects>Inner Bevel: as before, only change color back to white
68. Selections>Select None
69. Add text as desired
70. Resize & save for desired use.
That's it, you are done!
I hope you have enjoyed this tutorial, and thank you for trying it. If so, feel free to leave a comment, they are nice to see but not required.
LEGAL INFO:
This tutorial was written and designed by Deborah and is made using teaching and tips gained from the web and PSP, Animation Shop, and the other programs used, the programs listed Help feature; and is my own creation. Any resemblance to other tutorials available is coincidental.
Please do not share this tutorial or to place it on any web site without my written permission. Please do not translate this tutorial into any other language without my written permission: kay2ndjackson@gmail.com. If sharing, please direct to my blog site at: http://deborahscornerincyberspace.blogspot.com/
34. Repeat the smudge in the same place if needed to make it look like my example above
35. Move to the next rounded edge, and repeat the smudge as above.
36. Repeat smudge for remaining rounded edges
37. Activate the Star layer (top layer)
38. Effects>3D Effects>Drop Shadow: V&H: 3, Opacity: 100, Blur: 4, Color: black, Shadow new layer: Unchecked
39. Repeat Drop Shadow with this change only: V&H: -3
40. Layers>Merge>Merge All
41. Image>Add borders: 1, symmetric checked, Color: black
------------------------------
42.*1 - Image>Add borders: 7, symmetric, white
Magic Wand (settings: Add/Shift, RGB Value, Tolerance: 0, All layers: UNchecked, Contiguous: checked, Feather: 0, Anti-alias: checked, Outside: selected) inside new border
Flood fill with FG (gradient)
Effects>3D Effects>Inner Bevel: #1, 2, 0, 2, 0, 0, white, 315, 86, 20
Adjust>Add/Remove Noise>Add noise: as before
Select None
------------------------------
43. Image>Add border: 10, symmetric, white
44. Magic wand inside new border
45. Maximize DCIC Cranberry Season Paper 20
46. Edit>Copy
47. Reminimize
48. Image>Paste into selection
49. Effects>3D Effects>Inner Bevel: as before
50. Repeat *1 above
51. Image>Add border: 20, symmetric, white
52. Magic Wand inside new border
53. Select and open a 2nd paper of choice from DCIC Cranberry Season Papers
54. Edit>Copy
55. Close image
56. Image>Paste into selection
57. Effects>3D Effects>Inner bevel: as before only change color to FG
58. Adjust>Add/Remove Noise>Add Noise: as before
59. Effects>Distortion Effects>Ripple (Settings: Center offset - Horizontal: 50.00, Vertical: 50 / Settings - Amplitude: 10, Wavelength: 40 / Edge Mode: Transparent: checked
60. Selections>Select None
61. Image>Add border: 7, symmetric, white
62. Magic wand inside new border
63. Maximize DCIC Cranberry Season Paper 20
64. Edit>Copy
65. Close
66. Image>Paste into selection
67. Effects>3D Effects>Inner Bevel: as before, only change color back to white
68. Selections>Select None
69. Add text as desired
70. Resize & save for desired use.
That's it, you are done!
I hope you have enjoyed this tutorial, and thank you for trying it. If so, feel free to leave a comment, they are nice to see but not required.
LEGAL INFO:
This tutorial was written and designed by Deborah and is made using teaching and tips gained from the web and PSP, Animation Shop, and the other programs used, the programs listed Help feature; and is my own creation. Any resemblance to other tutorials available is coincidental.
Please do not share this tutorial or to place it on any web site without my written permission. Please do not translate this tutorial into any other language without my written permission: kay2ndjackson@gmail.com. If sharing, please direct to my blog site at: http://deborahscornerincyberspace.blogspot.com/
New scrap kit by Deborah.
I have been working on this one for several weeks, and finished last night. It is named Cranberry Season, and is based around the color of Cranberries. It is a tagger size and in png format, so is smaller than the previous kits that I have made and shared. This one will be featured in a PSP tutorial later in the week as well, so be on the lookout for it.
Now for what the kit contains:
20 papers
2 Quick pages
85 Elements
- 4 each of frames, bows, buttons and assorted graphics, and;
- 13 Recipe cards
The uploads are to two places; RapidShare and 4-Shared, links are below the previews.
Here is the preview of the Scrap Kit. Not all items are shown, but there is at least one of everything (except the papers) to give you an idea.
 Link to 4-shared
Elements
Papers
Here is the preview of the first Quick page:
Link to 4-shared
Elements
Papers
Here is the preview of the first Quick page:
 And here is the preview of the 2nd Quick Page:
 Links for QuickPages:
4-Shared
Thank you to all who download and Happy Scrapping.
If you feel like leaving a comment, they are greatly appreciated, but not mandatory.
Huggers,
Deborah in NC
Links for QuickPages:
4-Shared
Thank you to all who download and Happy Scrapping.
If you feel like leaving a comment, they are greatly appreciated, but not mandatory.
Huggers,
Deborah in NC
It's A Gingerbread Christmasby Deborah in NC PDF Version of Tutorial hereSupplies Needed:PSP (written in PSP X, will work in other versions)-PinkuPixie - Gingerbread Christmas found hereThis was part of a large blog train, and links for other parts are listed below the download area of PinkuPixie's sitePlugin used: Eye Candy 4000Let's begin:1. Open a new image 500x500, pixels, raster, transparent2. Select All3. Open 1st paper of choice from kit in PSP4. Edit>CopyCloseEdit>Paste into selectionSelections>Modifify>Contract: 25New Raster LayerOpen 2nd paper of choice from kitEdit>CopyCloseEdit>Paste into selectionSelections>Select NoneMagic Wand: default settings outside the 2nd paper in PSPEffects>3D Effects>Cutout: Vertical and Horizontal: 0, Opacity: 100, Blur: 20, Color: Black, Fill interior with color: UNcheckedSelections>Select NoneMerge VisibleOpen ppixie_gbc_frameEdit>CopyCloseEdit>Paste as a new layerImage>Resize: 15, Percent, Resample using: Pixel Resize, Lock Aspect Ratio: checked, Resize all layer: UNcheckedEffects>3D Effects>Drop Shadow: Vertical & Horizontal: 1, Opacity: 80, Blur: 5, Color: Black, Drop shadow on new layer: UNcheckedMagic Wand inside frame areaNew raster layerLayers>Arrange>Move DownSelections>Modify>Expand: 15Flood fill with whiteEffects>Plugins>Eye Candy 4000>HSB Noise: Click on Settings Option, Select: Smooth Fractal NoiseSettings for rest of plugin: Hue Variation: 100, Saturation Variation: 100, Brightness Variation: 45, Opacity Variation: 0, Lump Width (pixels): 72.00, Lump Height: 82.00, Pattern: Smooth Fractal, Fractal Roughness: 92, Seamless Tile: UNchecked, Random Seed: 1Selections>InvertEffects>Plugins>Eye Candy 4000>Gradient Glow: Basic Tab - Glow Width (pixels): 25.00, Soft Corners (%): 25, Overall Opacity (%): 35, Draw Only Outside Selection: CheckedColor Tab: Rainbow, Opacity: 100, Selections>Select NoneActivate the top layerLayers>Merge DownOpen Candy Cane image from kit in PSP.Edit>CopyCloseEdit>Paste as a new layerImage>Resize: 15, Percent, Resample using: Pixel Resize, Lock Aspect Ratio: checked, Resize all layer: UNcheckedMove to bottom right corner of frame imageDuplicate layerImage>MirrorImage>Rotate>Right, 45.00, nothing else checkedMove to top left corner of frameAdjust>Sharpness>SharpenEffects>3D Effects>Drop Shadow: Vertical & Horizontal: 3, Opacity: 40, Blur: 5, Color: Black, Drop shadow on new layer: UNcheckedActivate 1st Candy Cane layerEffects>3D Effects>Drop Shadow: Vertical & Horizontal: -3, all other the sameOpen Gingerbread Girl image in PSPEdit>CopyCloseEdit>Paste as a new layerImage>Resize: 15, Percent, Resample using: Pixel Resize, Lock Aspect Ratio: checked, Resize all layer: UNcheckedMove to bottom left corner of your imageEffects>3D Effects>Drop Shadow: Vertical & Horizontal: 0, Opacity: 90, Blur: 15, Color: Black, Drop shadow on new layer: UNcheckedOpen Gingerbread boy image in PSPEdit>CopyCloseEdit>Paste as a new layerImage>Resize: 15, Percent, Resample using: Pixel Resize, Lock Aspect Ratio: checked, Resize all layer: UNcheckedMove to top right corner of your imageEffects>3D Effects>Drop Shadow: Vertical & Horizontal: 0, Opacity: 90, Blur: 15, Color: Black, Drop shadow on new layer: UNcheckedOpen the Peppermint Candy image in PSPEdit>CopyCloseEdit>Paste as a new layerImage>Resize: 15, Percent, Resample using: Pixel Resize, Lock Aspect Ratio: checked, Resize all layer: UNcheckedMove to bottom right corner of your imageEffects>3D Effects>Drop Shadow: Vertical & Horizontal: 0, Opacity: 90, Blur: 15, Color: Black, Drop shadow on new layer: UNcheckedOpen one of the Gumdrop images in PSPEdit>CopyCloseEdit>Paste as a new layerImage>Resize: 15, Percent, Resample using: Pixel Resize, Lock Aspect Ratio: checked, Resize all layer: UNcheckedMove to bottom right corner of your image, placing over the Peppermint Candy image slightlyEffects>3D Effects>Drop Shadow: Vertical & Horizontal: 0, Opacity: 90, Blur: 15, Color: Black, Drop shadow on new layer: UNcheckedLayers>Merge downLayers>DuplicateMove the top copy to the upper left corner of the imageLayers>Merge All (flatten)Image>Add border: Symmetric: Checked, Left: 1, Color: BlackApply text to inside the frame in color, font and size you wish, along with any drop shadow you wantAdd a layer and your watermark.Resize and save for desired use.To get a very colorful effect, try repeating the Eye Candy 4000>HSB Noise over the whole image. You will end up with something like this:
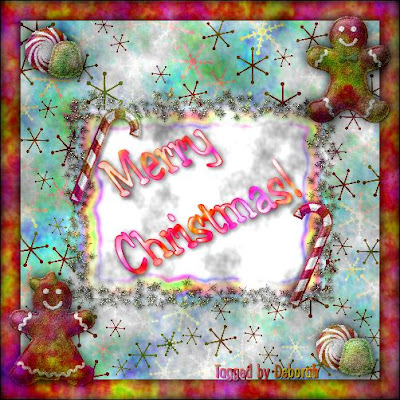 I hope you enjoyed this tutorial, and that you and yours have a very Blessed Christmas! I thank you for trying the tutorial, and please feel free to leave a comment, they are nice to see but not required.
If you wish to share your results with me, email them to kay2ndjackson@gmail.com, I would love to see your results.
LEGAL INFO:
This tutorial was written and designed by Deborah and is made using teaching and tips gained from the web and PSP, Animation Shop, and the other programs used, the programs listed Help feature; and is my own creation. Any resemblance to other tutorials available is coincidental.
Please do not share this tutorial or to place it on any web site without my written permission. Please do not translate this tutorial into any other language without my written permission: kay2ndjackson@gmail.com. If sharing, please direct to my blog site at: http://deborahscornerincyberspace.blogspot.com/This tutorial was conceived on December 6, 2009, Released to blog site December 6, 2009.
 Christmas Maskedby Deborah in NCSupplies Needed:PSP (written in PSP X, will work in other versions)Zip file here---CERDA~colored fairies_Layers-Chmas-24-KK's-DeZines-IE_Tube83_Juletrae-LiteBlue Fairy-mask 1-mask 2Plugins needed: Filters UnlimitedPDF document of tutorial here
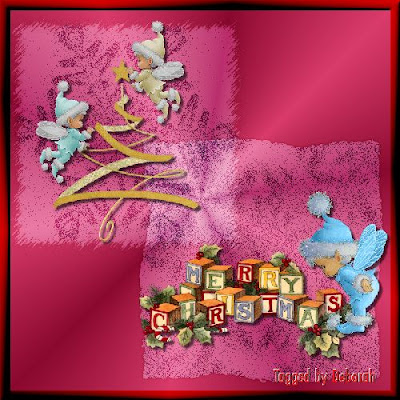
Lets Begin:1. Open a new image 800x800, pixels, Raster, Transparent2. Set FG in material palette to 2 color gradient, and select or create a gradient of choice (light to medium colors work best). Settings: Angle: 45, Repeats: 9, Radial, Vertical and Horizontal: 503. Flood fill image with FG (gradient)4. New image 500x500, pixels, Raster, Transparent5. Material palette, change the FG to a medium complimentary color to your larger image, and BG to white6. Flood fill new image with FG7. New raster layer8. Flood fill with BG (white)9. Layers>New Mask Layer: Mask 1, Source luminance: checked, Invert mask data: UNchecked10. Merge group11. Change blend mode: Dissolve(Double click on top layer to open dialogue box, OR right click on layer-select properties to open dialogue box, OR use the blend mode bar on right side of layer)12. Merge visible.13. Effects>Plugins>Filters Unlimited>Square Edges: #114. Edit>Copy15. Minimize image16. Working copy: Edit>Paste as a new layer17. Move to top left corner18. Change blend mode: soft light19. Drop shadow: Vertical & Horizontal: 2, Opacity: 80, Blur: 8, Color: black, Shadow on new layer: UNchecked20. Repeat drop shadow, change Vertical & Horizontal: -221. Maximize masked image. Undo to the point of the white flood fill, it should still be visible.22. Layers>New Mask Layer: Mask 2, Source luminance: checked, Invert mask data: UNchecked23. Merge group24. Change blend mode: Dissolve25. Merge visible26. Effects>Plugins>Filters Unlimited>Square Edges: #1227. Edit>Copy28. Minimize image29. Working copy: Edit>Paste as a new layer30. Repeat steps 18, 19, & 2031. Move to bottom right corner32. Open IE_Tube83_Juletrae33. Edit>Copy34. Close35. Working copy: Edit>Paste as a new layer36. Resize layer: 80%37. Move to position over whichever masked layer you prefer, position in center38. Drop Shadow: Vertical & Horizontal: 4, Opacity: 80, Blur: 6, Color: black, Shadow on new layer: UNchecked39. Open --CERDA~colored fairies_Layers.40. Select one of the fairies layers in layer palette, then Edit>Copy41. Minimize42. Working copy: Edit>Paste as a new layer43. Move to position placing star on tree44. Drop shadow: as before45. Maximize --CERDA~colored fairies_Layers46. Select the same or a different fairy, then Edit>Copy47. Close48. Working copy: Edit>Paste as a new layer49. Image>Mirror50. Move to position where you wish to place by the tree.51. Drop shadow: as before52. Open Chmas-24-KK's-DeZines.53. Edit>Copy54. Close55. Working copy: Edit>Paste as a new layer56. Resize layer: 80%57. Move to position on the other masked layer.58. Drop shadow: as before59. Open LiteBlue Fairy60. Edit>Copy61. Close62. Working copy: Edit>Paste as a new layer63. Resize layer: 80%64. Image>Mirror (if desired)65. Move to position around the block image (see my example for placement)66. Drop shadow: as before67. Selections>Select All68. Selections>Modify>Contract: 2069. Selections>Invert70. Check that none of the masked layers overlap into the selected area. If they do, use the mover tool to reposition inside the selected area, as well as any of the tube layers that may need repositioning71. Merge Visible.72. Selection>Promote Selection to layer73. Inner Bevel: #2, 12, 4, 4, 0, 0, white, 315, 50, 2074. Change blend mode: Burn75. Merge Visible76. Select None77. Add layer and watermark78. Resize to desired use.79. SaveYou are finished!!!I hope you enjoyed this tutorial, and that you and yours have a very Blessed Christmas! I thank you for trying the tutorial, and please feel free to leave a comment, they are nice to see but not required.If you wish to share your results with me, email them to kay2ndjackson@gmail.com, I would love to see your results.LEGAL INFO:This tutorial was written and designed by Deborah and is made using teaching and tips gained from the web and PSP, Animation Shop, and the other programs used, the programs listed Help feature; and is my own creation. Any resemblance to other tutorials available is coincidental.Please do not share this tutorial or to place it on any web site without my written permission. Please do not translate this tutorial into any other language without my written permission: kay2ndjackson@gmail.com. If sharing, please direct to my blog site at: http://deborahscornerincyberspace.blogspot.com/This tutorial was conceived on December 3, 2009, Released to blog site December 6, 2009.Tubes by talented others, if tuber known it is in the tube image, I received them through group shares and am sharing as I received them.Here is another example: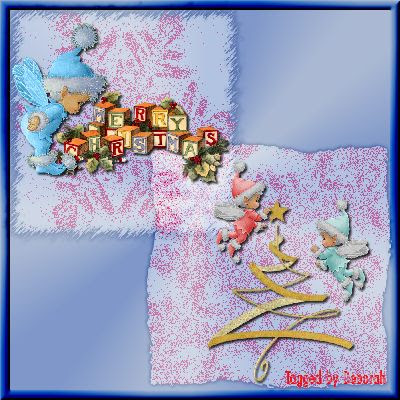
Christmas Treeby Deborah in NC Skill Level: Intermediate (working knowledge of PSP helpful, colorizing knowledge a must)Supplies Needed:PSP (written in PSP X, will work in other versions)Christmas Tree zip file here-ChristmasTree_White_LG_patao-dkj_09-Garland overlay-dkj_09-gift master-dkj_09-ornament master-dkj_09-star master-dkj_09-teddy bear master-dkj_09-word art MCAlso included-dkj_09-ornament master-blue-dkj_09-ornament master-green-dkj_09-ornament master-orange-dkj_09-ornament master-pink-dkj_09-ornament master-purple-dkj_09-ornament master-red-dkj_09-ornament master-silver-dkj_09-ornament master-yellowEye Candy 4000>CoronaUnzip supplies to location of choice so you can find them easily.Let's begin.New image: 500x600, pixels, raster, BlackOpen ChristmasTree_White_LG_pataoEdit>CopyClose originalEdit>Paste as a new layer on working copyOpen dkj_09-Garland overlayDuplicate (Shift+D on keyboard)Close original.Bottom garland layer should be the active layer (if not, click the layer to activate it)Edit>CopyWorking copy, Edit>paste as a new layer--------------------#1 - Selections>Select AllSelections>FloatSelections>DefloatSelections>Modify>Expand: 4Layers>New raster layerFlood fill with a color or gradient of choiceSelections>Select NoneAdjust>Blur>Blur MoreAdjust>Add noise>Gaussian Blur: checked, Noise: 50, Monochrome: checkedEffects>3D Effects>Drop Shadow: Vertical & Horizontal: 2, Opacity: 40, Blur: 9, Color: Black, Shadow on new layer: UNcheckedLayers>Merge Down--------------------Mover tool, move to bottom boughs of Christmas Tree.Back to dkj_09-Garland overlay, activate 3rd garland layerEdit>CopyWorking copy, Edit>paste as a new layerRepeat #1 aboveMover tool, move above the garland on the bottom boughs of Christmas Tree. (see example above for placement)Back to dkj_09-Garland overlay, activate 2nd garland layerEdit>CopyWorking copy, Edit>paste as a new layerRepeat #1 aboveMover tool, move to upper branches of Christmas Tree (see example above for placement)Back to dkj_09-Garland overlay, activate top garland layerEdit>CopyWorking copy, Edit>paste as a new layerRepeat #1 aboveMover tool, move to uppermost branches of Christmas Tree (see example above for placement)Open dkj_09-ornament master (there are two layers, ornament (bottom) layer will be active......or you can select from the available colorized ornaments in the zip file to open instead.Duplicate Image (Shift+D on keyboard)Close originalColorize to desired color (Skip this step if you are using any of the colored ornaments)Edit>Copy MergedBack to working copyEdit>paste as a new layerDrop shadow: settings as beforeImage>Resize the ornament if desiredMover tool, position on the tree where desiredIf you wish to have all your ornaments the same color, duplicate layer, and position in other portions of the treeIf you wish to have different colors, go back to ornament, undo the previous colorization, and recolorize.Use as many or as few as you like.Open dkj_09-star master.Duplicate Image (Shift+D on keyboard)Close originalColorize to desired colorEdit>Copy Back to working copyEdit>paste as a new layerMove to top of treeEffects>Plugins>Eye Candy 4000>Corona (Settings: Glow Width: 26.63, Flare Size: 5.00, Stretch: 100, Waver: 64, Blur: 0, Overal opacity: 100, Color: very light color of choice (I used a pale yellow), Draw Only Outside Selection: Checked, Radiate from the selection: UNchecked, Random Seed: 1Open dkj_09-gift masterDuplicate Image (Shift+D on keyboard)There are 3 layers; bottom layer the gift layer, middle layer is the vertical ribbon, top layer the horizontal ribbon. Each layer can be colorized to colors of choice. Ribbon layers can be moved to position of choice as well.Once you have the gift and ribbons colorized to your liking, Edit>Copy mergedBack to working copy, Edit>Paste as a new layerResize and/or rotate to your liking.Move to position at the bottom of the treeRepeat for as many gifts as you wish to use, colorizing differently if you like by activating the original gift image, undoing previous colorizing, and re-colorize.Open dkj_09-teddy bear.Edit>Copy Back to working copyEdit>paste as a new layerMove to bottom of the tree, position (mirror if need be) at the bottom of the tree.Drop Shadow: Vertical & Horizontal: 2, Opacity: 60, Blur: 5, Color: Black, Shadow on new layer: UNcheckedOpen dkj_09-Word ArtDuplicate Image (Shift+D on keyboard)Colorize if desiredEdit>Copy Back to working copyEdit>paste as a new layerImage>Free Rotate: Left: Selected, 25, nothing checkedDrop shadow: as beforeDrop shadow: change vertical and horizontal: -2, all other settings the sameRepeat Effects>Eye Candy 4000>Corona, change color if desireLayers>Merge AllImage>Add border: Symmetric: checked, Left: 1, color: whiteImage>Add border: Symmetric: checked, Left: 1, color: blackAdd raster layerAdd watermarkResize to desired sizeJpeg and saveI hope you enjoyed this tutorial, and that you and yours have a very Blessed Christmas! I thank you for trying the tutorial, and please feel free to leave a comment, they are nice to see but not required.If you wish to share your results with me, email them to kay2ndjackson@gmail.com, I would love to see your results.LEGAL INFO:
This tutorial was written and designed by Deborah and is made using teaching and tips gained from the web and PSP, Animation Shop, and the other programs used, the programs listed Help feature; and is my own creation. Any resemblance to other tutorials available is coincidental.
Please do not share this tutorial or to place it on any web site without my written permission. Please do not translate this tutorial into any other language without my written permission: kay2ndjackson@gmail.com. If sharing, please direct to my blog site at: http://deborahscornerincyberspace.blogspot.com/This tutorial was conceived on December 3, 2009, Released to blog site December 4, 2009.Graphics used in this tutorial, Tree tubed by unknown sourceRest of items were the creation of Deborah in NCTubes by Deborah are shared on Google groups at this group: http://groups.google.com/group/psp-tubes-suchTutorial in pdf format can be found here


