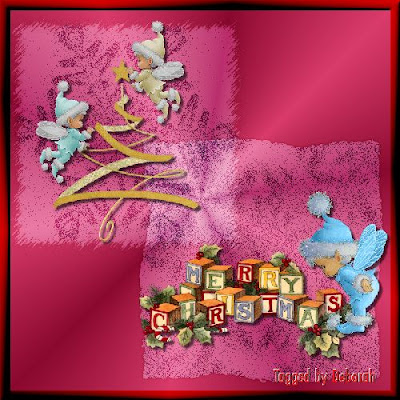
Christmas Masked
by Deborah in NC
Supplies Needed:
PSP (written in PSP X, will work in other versions)
Zip file here
---CERDA~colored fairies_Layers
-Chmas-24-KK's-DeZines
-IE_Tube83_Juletrae
-LiteBlue Fairy
-mask 1
-mask 2
Plugins needed: Filters Unlimited
PDF document of tutorial here
Lets Begin:
1. Open a new image 800x800, pixels, Raster, Transparent
2. Set FG in material palette to 2 color gradient, and select or create a gradient of choice (light to medium colors work best). Settings: Angle: 45, Repeats: 9, Radial, Vertical and Horizontal: 50
3. Flood fill image with FG (gradient)
4. New image 500x500, pixels, Raster, Transparent
5. Material palette, change the FG to a medium complimentary color to your larger image, and BG to white
6. Flood fill new image with FG
7. New raster layer
8. Flood fill with BG (white)
9. Layers>New Mask Layer: Mask 1, Source luminance: checked, Invert mask data: UNchecked
10. Merge group
11. Change blend mode: Dissolve
(Double click on top layer to open dialogue box, OR right click on layer-select properties to open dialogue box, OR use the blend mode bar on right side of layer)
12. Merge visible.
13. Effects>Plugins>Filters Unlimited>Square Edges: #1
14. Edit>Copy
15. Minimize image
16. Working copy: Edit>Paste as a new layer
17. Move to top left corner
18. Change blend mode: soft light
19. Drop shadow: Vertical & Horizontal: 2, Opacity: 80, Blur: 8, Color: black, Shadow on new layer: UNchecked
20. Repeat drop shadow, change Vertical & Horizontal: -2
21. Maximize masked image. Undo to the point of the white flood fill, it should still be visible.
22. Layers>New Mask Layer: Mask 2, Source luminance: checked, Invert mask data: UNchecked
23. Merge group
24. Change blend mode: Dissolve
25. Merge visible
26. Effects>Plugins>Filters Unlimited>Square Edges: #12
27. Edit>Copy
28. Minimize image
29. Working copy: Edit>Paste as a new layer
30. Repeat steps 18, 19, & 20
31. Move to bottom right corner
32. Open IE_Tube83_Juletrae
33. Edit>Copy
34. Close
35. Working copy: Edit>Paste as a new layer
36. Resize layer: 80%
37. Move to position over whichever masked layer you prefer, position in center
38. Drop Shadow: Vertical & Horizontal: 4, Opacity: 80, Blur: 6, Color: black, Shadow on new layer: UNchecked
39. Open --CERDA~colored fairies_Layers.
40. Select one of the fairies layers in layer palette, then Edit>Copy
41. Minimize
42. Working copy: Edit>Paste as a new layer
43. Move to position placing star on tree
44. Drop shadow: as before
45. Maximize --CERDA~colored fairies_Layers
46. Select the same or a different fairy, then Edit>Copy
47. Close
48. Working copy: Edit>Paste as a new layer
49. Image>Mirror
50. Move to position where you wish to place by the tree.
51. Drop shadow: as before
52. Open Chmas-24-KK's-DeZines.
53. Edit>Copy
54. Close
55. Working copy: Edit>Paste as a new layer
56. Resize layer: 80%
57. Move to position on the other masked layer.
58. Drop shadow: as before
59. Open LiteBlue Fairy
60. Edit>Copy
61. Close
62. Working copy: Edit>Paste as a new layer
63. Resize layer: 80%
64. Image>Mirror (if desired)
65. Move to position around the block image (see my example for placement)
66. Drop shadow: as before
67. Selections>Select All
68. Selections>Modify>Contract: 20
69. Selections>Invert
70. Check that none of the masked layers overlap into the selected area. If they do, use the mover tool to reposition inside the selected area, as well as any of the tube layers that may need repositioning
71. Merge Visible.
72. Selection>Promote Selection to layer
73. Inner Bevel: #2, 12, 4, 4, 0, 0, white, 315, 50, 20
74. Change blend mode: Burn
75. Merge Visible
76. Select None
77. Add layer and watermark
78. Resize to desired use.
79. Save
You are finished!!!
I hope you enjoyed this tutorial, and that you and yours have a very Blessed Christmas! I thank you for trying the tutorial, and please feel free to leave a comment, they are nice to see but not required.
If you wish to share your results with me, email them to kay2ndjackson@gmail.com, I would love to see your results.
LEGAL INFO:
This tutorial was written and designed by Deborah and is made using teaching and tips gained from the web and PSP, Animation Shop, and the other programs used, the programs listed Help feature; and is my own creation. Any resemblance to other tutorials available is coincidental.
Please do not share this tutorial or to place it on any web site without my written permission. Please do not translate this tutorial into any other language without my written permission: kay2ndjackson@gmail.com. If sharing, please direct to my blog site at: http://deborahscornerincyberspace.blogspot.com/
This tutorial was conceived on December 3, 2009, Released to blog site December 6, 2009.
Tubes by talented others, if tuber known it is in the tube image, I received them through group shares and am sharing as I received them.
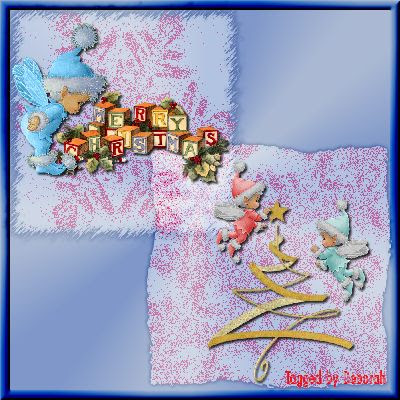
Here is another example:


No comments:
Post a Comment